How to Draw a Turkey Printable – Disguise the Turkey is a fun and creative Thanksgiving tradition that started in American elementary schools to help the turkey escape Thanksgiving dinner. It’s a simple but imaginative idea: participants use a simple turkey cutout before decorating it into a creative disguise with colorful accessories, outfits, and decorations. Think of it as the bird version of witness protection
Typical turkey disguises feature ballerina turkeys in tutus. The purpose is to make the turkey so cleverly hidden that it escapes the feast. Teachers and parents love this craft because it inspires storytelling, art, and humor. Children usually add small essays or descriptions to describe their turkey’s alter ego.
It didn’t stay just a school project for long thanks to Pinterest and social media, expanding into at-home and digital versions. It’s a fun, low-pressure way to enjoy Thanksgiving that brings smiles to kids and adults alike.
Are you looking for a fun and creative activity to do with your kids this Thanksgiving season? Look no further! Drawing a turkey printable is a great way to get into the holiday spirit and unleash your artistic talents. Whether you’re a seasoned artist or just starting out, this step-by-step guide will help you create a colorful and festive turkey that you can proudly display on your fridge or bulletin board.
To get started, all you need is a printable turkey template, some colored pencils or markers, and a dash of creativity. Simply follow the instructions below and let your imagination soar as you bring your turkey to life. So grab your supplies and let’s get drawing!
Step 1: Gather Your Materials
Before you begin drawing your turkey, make sure you have all the necessary materials on hand. Download and print out a turkey template from a reliable source online. Next, gather your colored pencils or markers in various shades to add dimension and personality to your feathered friend. Don’t forget to clear off a nice workspace with plenty of room to spread out your supplies and get comfortable.
Now that you have everything you need, take a moment to envision how you want your turkey to look. Will it be a traditional brown and red turkey, or will you add a whimsical twist with rainbow feathers? The choice is yours, so let your creativity guide you as you embark on this artistic journey.
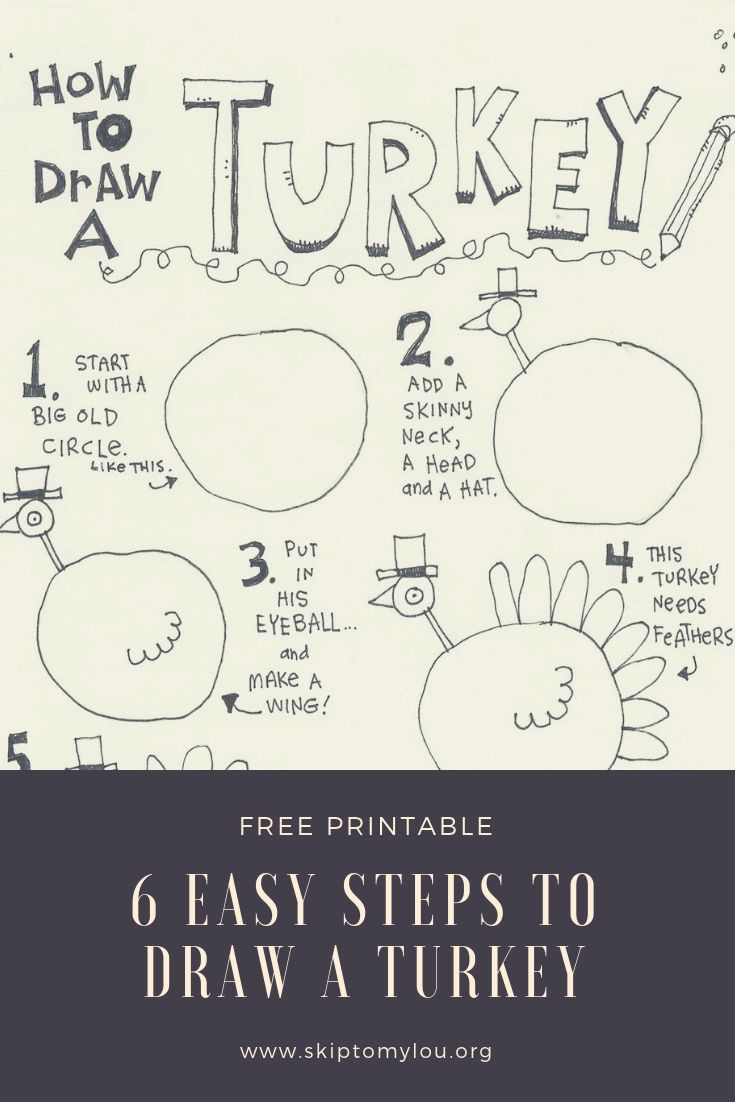
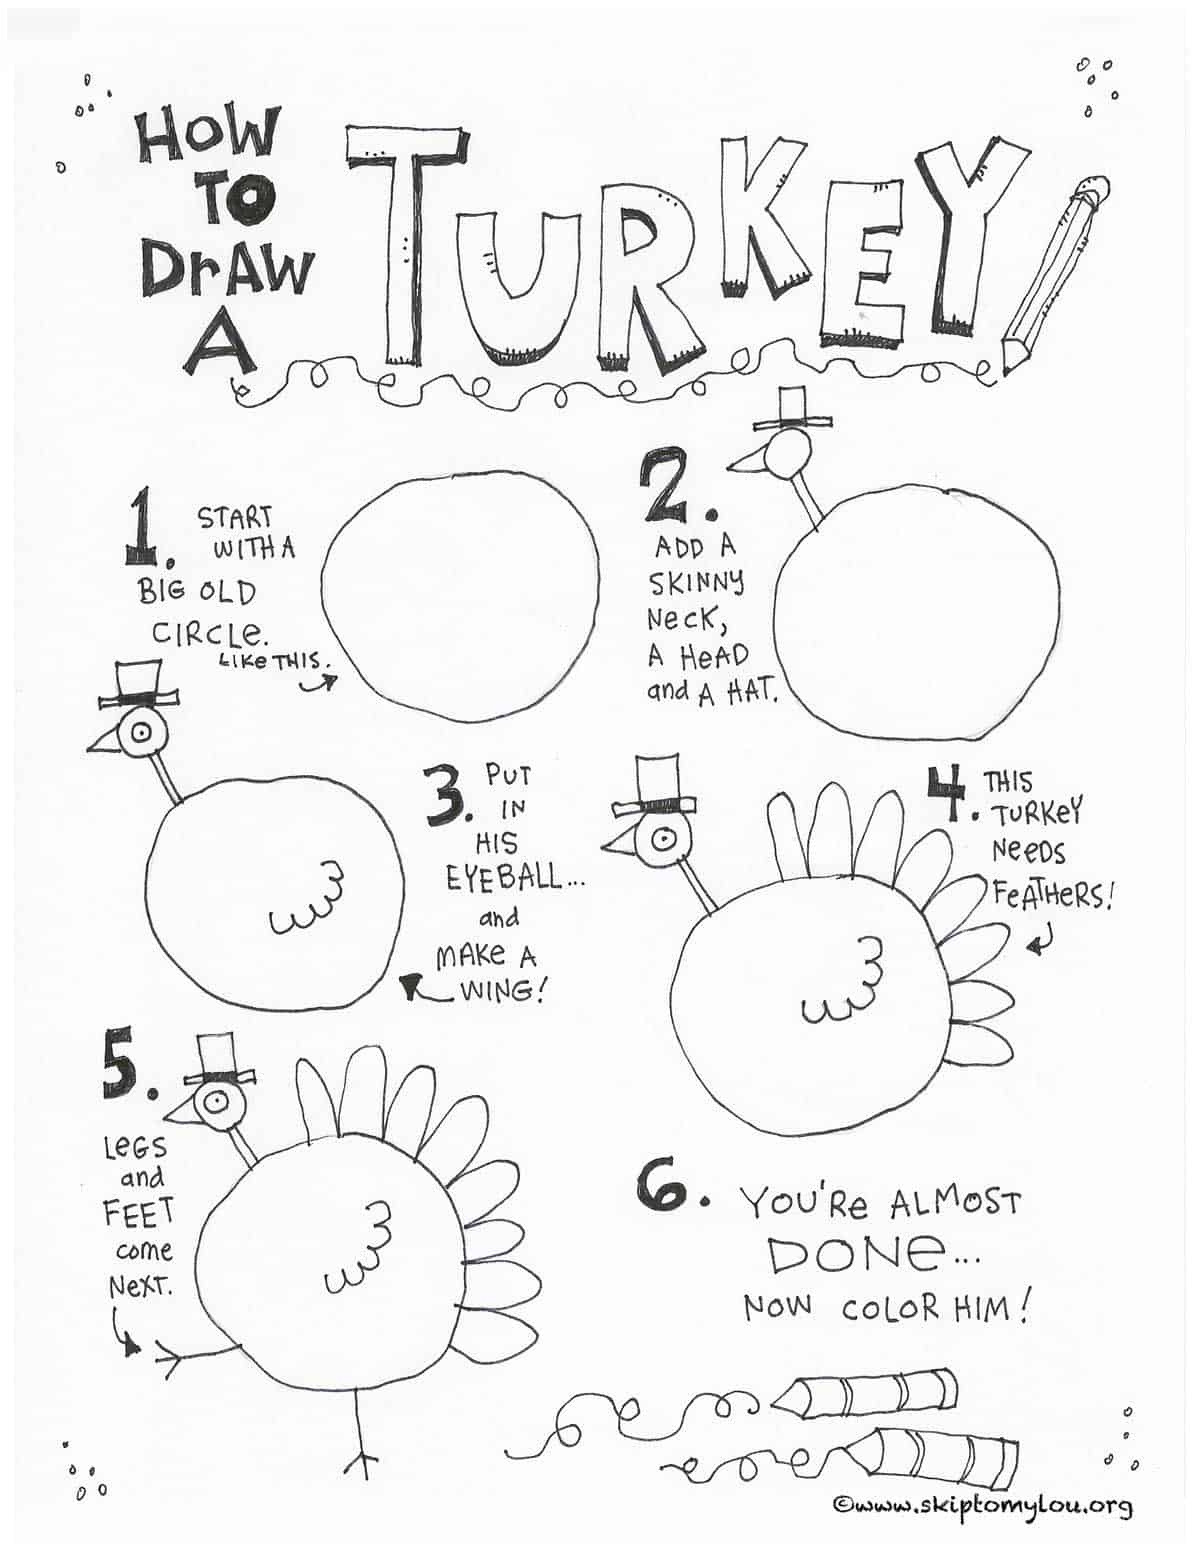
Step 2: Start Drawing Your Turkey
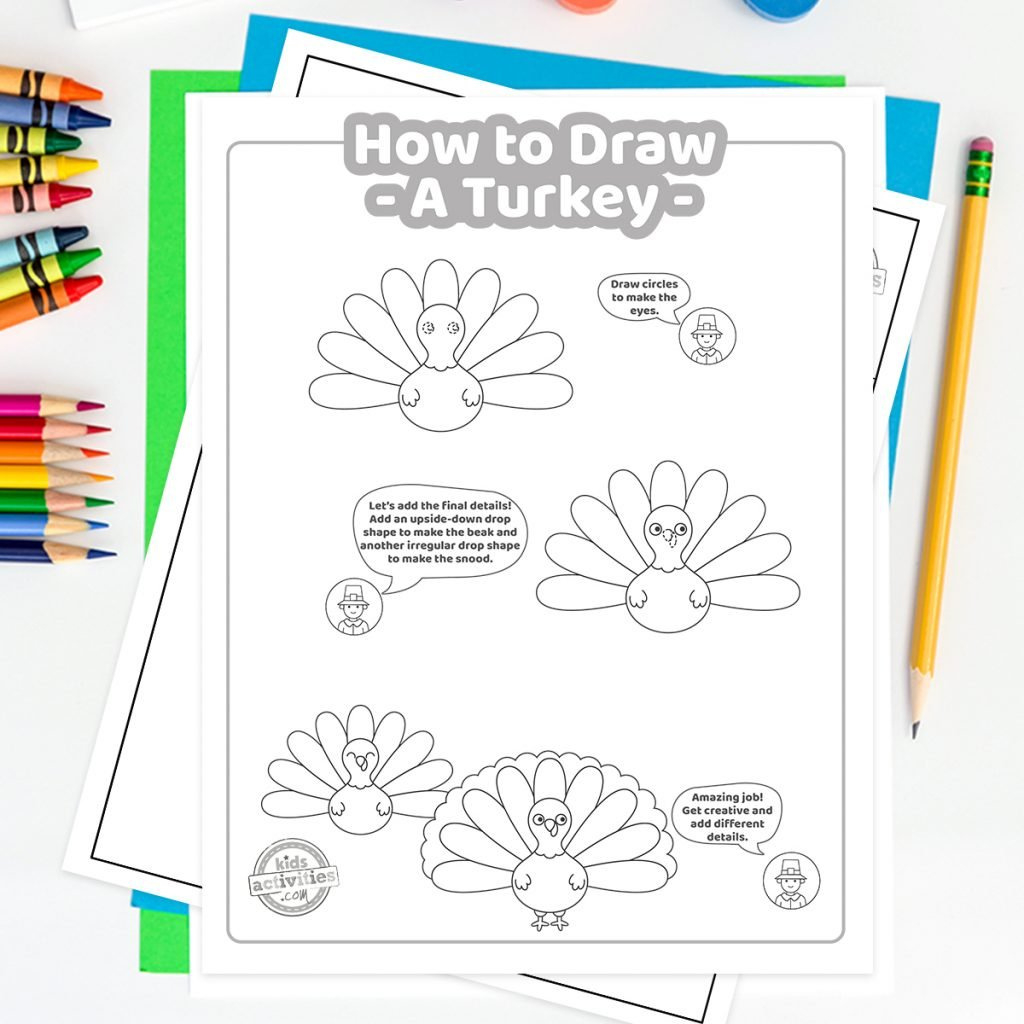
With your turkey template in front of you and your colorful supplies ready, it’s time to start drawing. Begin by tracing the outline of the turkey with a pencil to ensure your lines are clean and precise. Once you’re satisfied with the shape, start adding details like the eyes, beak, and wattle. Feel free to experiment with different expressions and poses to give your turkey a unique personality.
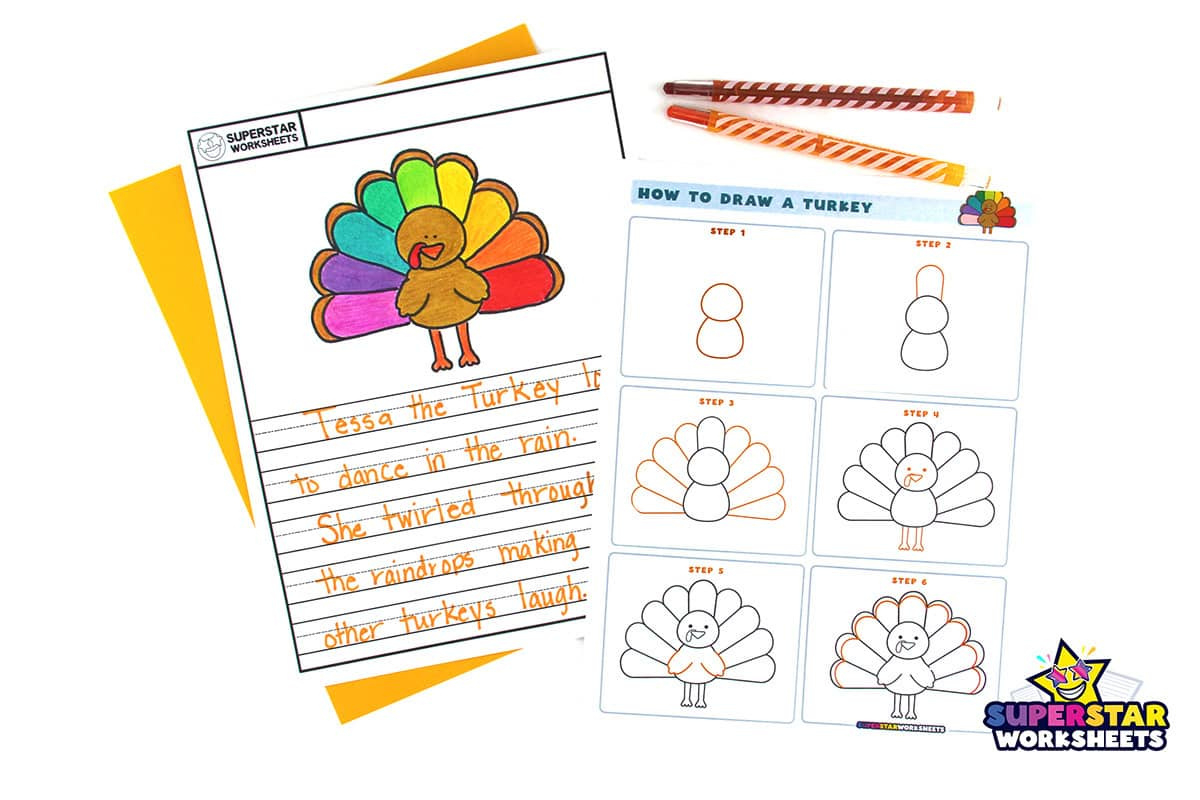
Next, it’s time to add the feathers. Use your colored pencils or markers to fill in the turkey’s plumage, layering different shades to create a vibrant and textured look. Don’t be afraid to mix and match colors to make your turkey stand out from the crowd. Finally, add any finishing touches like a background or accessories to complete the scene.
Now step back and admire your handiwork. You’ve successfully drawn a colorful and festive turkey that’s sure to impress your family and friends. Display your masterpiece proudly and enjoy the feeling of accomplishment that comes with creating something beautiful from scratch. Happy drawing!
Printable Turkey in Disguise…
[show-list showpost=5 category=”turkey-in-disguise” sort=sort]
Copyright Disclaimer: The map images presented on this site are obtained from online sources and are protected by their respective copyrights. We do not assert any ownership or copyright to these images. If you are the copyright holder, please contact us to request removal or proper credit.
Leave a Reply